User Provisioning and the Tableau Server REST API

Use case: A software company wants to embed analytics in their app. Their customers log into their application directly.

Ideally, these customers are then also automatically signed in to see Tableau content. Provisioning refers to the concepts and methods we'll use to make sure Tableau Server is aware of the app's users, allowing them to log in and interact. More specifically, provisioning refers to the process in which we'll create and manage users on Tableau Server, based on the users in the application.

Skip this whole section if you just want to use a demo account and show the "cool" features such as interacting with views, rather than seeing the full provisioning process.

Before registration

In our example use case, people are allowed to register for accounts in our application by themselves. The last 10 users to have registered are shown in the adjacent table. If you have not registered for this app earlier, you won't be listed here. Note that accounts created are available for a limited time and then removed, as they are used for demonstration purposes only.

Tableau Server | Last 10 Users

Registration & Provisioning

The following steps are part of our registration and user provisioning process. As you perform these with the form on the right, we'll show you what is happening in this area.

1. Complete the form first

Fill the form on the right. We'll submit it in the next step.

Go ahead 👉
2. Register the user with our application

Now submit the form to actually register your user with our application.

Submit the form on the right to see the results.

Registration Form

Create a test account here to experience the user provisioning flow!

Choose a username for this demonstration.
Do not use any serious personal password! This is just a demo.
Repeat your password to ensure it was entered correctly.
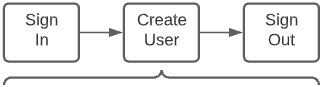
3. Create the user on Tableau Server

The process for creating the user on Tableau Server is illustrated below. Let's focus on the REST API interaction (request, response) needed for the creation of the user.

Create User Request

POSThttps://dub01.online.tableau.com/api/v3.10/site/885ea962-3f8c-4b54-b729-ebd858207825/users

Data:
{
  "user": {
    "name": "",
    "siteRole":  "Viewer"
  }
}
Create User Response

Data:

If you've gone through the two previous steps, you can now click "Send to REST API!" to launch the request.

Conclusions and Options for Provisioning

In reality, the above steps would take place in one go, of course. A user registering for our portal or application, would automatically have their Tableau Server user be created at the same time; without even realizing it.

Here are some common ways of provisioning users.

  • Just-in-Time: when a user registers, the registration process includes a step where the user is created (similar to the process demonstrated here). If the app user existed before but they do not have an account on Tableau Server, the creation happens when the user signs in (just in time).
  • Synchronization: A sync tool pulls a list of users and groups from an identity store, and adds, removes and updates memberships on Tableau Server where needed.
  • Push Provisioning: On changes to membership in the identity store, the identity provider itself pushes the change through the REST API.